PRODUCT LINKS BELOW CONTAIN COMPENSATED AFFILIATE LINKS AT NO COST
Spellbinders NEW April 2024 Arrivals are NOW available and can be found in the store HERE. Today I'm featuring the NEW Glimmering Flowers Collection.
My card features the NEW Glimmering Buttercups Glimmer Plate and Stencil Bundle (BD-0840). It is also available as a stand alone glimmer plate, Glimmering Buttercups Glimmer Plate (GLP-435). The stencil is ONLY available in the bundle.
I paired it with a sentiment from the Curved Everyday Sentiments Glimmer Plate & Die Set (GLP-434) and foiled with Aura Foil (GLF-0247).

Card Measurements:
White A2 Top Fold Card Base: 4 1/4" x 5 1/2" (4 1/4" x 11", scored at 5 1/2")
Peach Bellini Mat: 3 7/8" x 5 1/8"
White Foiled/Stenciled Panel: 3 3/4" x 5"
Vellum Band: 5" x 1" (wrapped around white panel and attached in the back)
White Sentiment Strip: 2 7/8" x 3/8"
Steps to Create Card:
- Create White A2 Top Fold Card Base measuring: 4 1/4" x 5 1/2" (4 1/4" x 11", scored at 5 1/2").
- Die Cut Peach Bellini Mat measuring: 3 7/8" x 5 1/8" using Precision Layering A2 B (S5-494).
- Cut White A2 Panel measuring: 4 1/4" x 5 1/2" and foil Glimmering Buttercups Glimmer Plate and Stencil Bundle (BD-0840) using Aura Foil (GLF-0247).
- Take foiled panel and use coordinating stencil from Glimmering Buttercups Glimmer Plate and Stencil Bundle (BD-0840). Use Peach Bellini, Coral Reef, Jelly Bean Green and Fresh Asparagus ink. Trim panel to measure: 3 3/4" x 5" using Precision Layering A2 A (S5-487).
- Foil "Birthday Wishes" sentiment from Curved Everyday Sentiments Glimmer Plate & Die Set (GLP-434) using Aura Foil (GLF-0247).
- Assemble card.
- Embellish with Clear Dew Drops.

Compensated affiliate links used when available. If you place an order after clicking on one of my links, I will receive a small commission at no cost to you. Thank you for your support! Spellbinders
SpellbindersGlimmering Flowers Collection
April 2024
Compensated affiliate links used when available. If you place an order after clicking on one of my links, I will receive a small commission at no cost to you. Thank you for your support!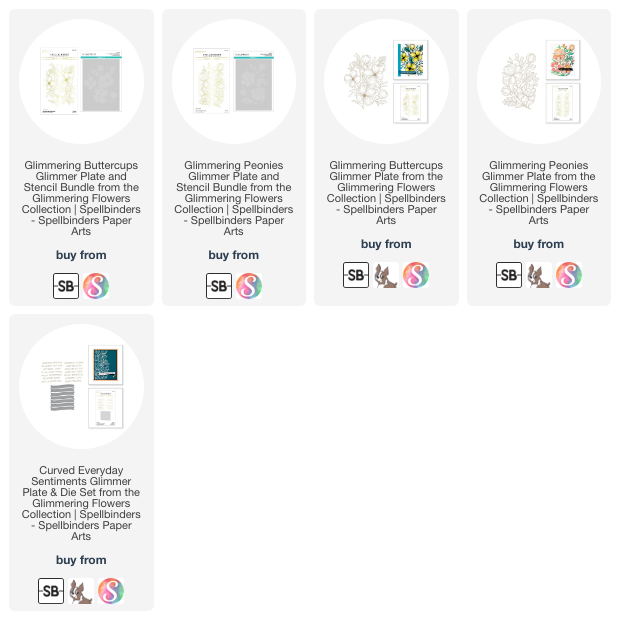 Happy Stamping!!
Happy Stamping!!